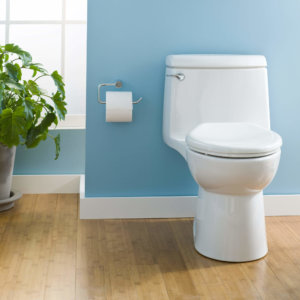
How to Install an American Standard Toilet
American Standard has a long history of providing outstanding products to discerning consumers. An American Standard toilet can add sophistication and comfort to your bathroom. It’s an excellent upgrade for your home, both functionally and aesthetically. If you have a good grasp of home improvement projects and basic DIY jobs, you should be able to complete a proper installation of your new American Standard toilet with the simple tools you already have on hand. Read as our Allied Plumbing & Heating Supply Co. team in Chicago, Illinois, walks you through the steps.
Gather Your Supplies

After purchasing your new American Standard toilet, you’re just a proper installation away from enjoying it. Installation should be easy if you regularly undertake DIY projects and understand basic plumbing. Don’t hesitate to call a plumber if you’re uncomfortable with any installation steps. Begin by assembling the following tools and equipment:
- Rubber gloves.
- Sponges.
- Adjustable wrench.
- Bucket.
- Putty knife.
- Rag.
- Level.
- Wax ring.
- Washers, nuts, and bolts.
- Slip-joint pliers.
- Replacement water supply line.
Remove the Existing Toilet
If you’re upgrading from an older toilet to a new American Standard installation, the first step is to remove your current toilet. Begin by turning off the water at the shut-off valve behind the toilet. Flush the toilet to remove the existing water from the bowl. If the bowl isn’t empty, use a plunger to force what remains down the drainpipe. Finally, put on some rubber gloves and sop up any remaining moisture with a sponge.
Use an adjustable wrench to disconnect the water supply line from the toilet. Place a bucket beneath the line to catch any water that spills out once it’s loose. Remove the bolts connecting the tank to the toilet bowl and lift the tank off. Open the bolt caps at the base of the toilet bowl to expose the bolts securing the toilet to the floor. Remove the nuts and washers from these bolts with your wrench.
Rock the toilet bowl from side to side to break the seal underneath. Lift the toilet bowl and remove it from the room once it comes loose. Stuff a rag into the open line to keep sewer gases from coming up. Cut the toilet seal away from the toilet flange on the floor using a putty knife and wipe it off with a damp sponge.
Check the Flange
The flange connects the toilet base to the bathroom floor. You can reuse it if it’s in good condition, but you should replace it if it’s damaged or corroded. Thoroughly clean the exposed surrounding floor during this step.
Prepare the Floor
Use a level to ensure the floor doesn’t slope. If the floor beneath the toilet is uneven, you can replace the bathroom flooring to remedy the issue or place shims under your new American Standard toilet so it sits level.
Place the Toilet
Lay the toilet on its side with a towel beneath it to prevent any damage. Position a new wax ring on the toilet’s bottom. Gently lift the toilet bowl and place it over the flange on the floor. You may need an extra set of hands to ensure proper positioning. The bolts on the flange must align with the bolt holes in the toilet base. Once the toilet is in position, press down on it to seal it in place.
Place a washer and a nut over the bolts of the toilet bowl. Gradually tighten the nuts on both sides, going back and forth between them to tighten the toilet evenly as you work. Don’t overtighten the nuts, as this can crack the toilet bowl. If your bolts are too long to fit beneath the bolt caps, trim them with a hacksaw.
If your American Standard toilet has a separate tank, place the tank on the bowl, and insert the tank bolts into the holes inside the tank. Place a washer and nut over each bolt. Gradually tighten the nuts in the same manner you used on the bowl, going back and forth so you keep the tank even.
Finally, install the toilet seat by securing its hinges to the back of the bowl using the provided screws.
Replace the Water Supply Line
Remove the water supply line from the wall. Purchase a replacement that’s the same size and at least as long as the original. Most water supply lines are good for six to eight years, so it’s best to put a new one in as you install the toilet. Connect one end of the water supply line to the wall and attach the other to your new American Standard toilet. Tighten the nut by hand, then secure it with slip-joint pliers.
Test the New Toilet Installation
Turn the water supply back on and let the tank fill. Watch for leaks around the water supply line and the toilet base. If you see any, you may need to replace the seal beneath the toilet or tighten the connection on either end of the water supply. Flush the toilet and continue to check for leaks.
Set a level on top of the toilet seat to ensure the toilet sits level. You may need to tighten or loosen the bolts slightly if it’s leaning in any direction. If the toilet is severely off-level, consider placing shims beneath it.
Get Professional Guidance
If you live in the Chicago area and need assistance or advice during any part of the toilet replacement process, contact our team at Allied Plumbing & Heating Supply Co. We can help ensure a proper installation for your new American Standard toilet to give you years of use with your new product.

